Branches
Branch Management Module
The Branch Management Module is a centralized system designed to streamline the process of adding, viewing, and managing branch information such as names, locations, and contact details. It ensures consistency and efficiency across the platform by allowing users to easily search, sort, and organize branch data.
How to Use the Module
Accessing Branches
To view the list of available branches, the user must click "Branches" on the side navigation menu.

Creating a New Branch
To create a new branch, the user must click on "Create Branch" and complete the form by entering the branch name, city/town, email address, contact number, and physical address. It is important to ensure all details are entered correctly.
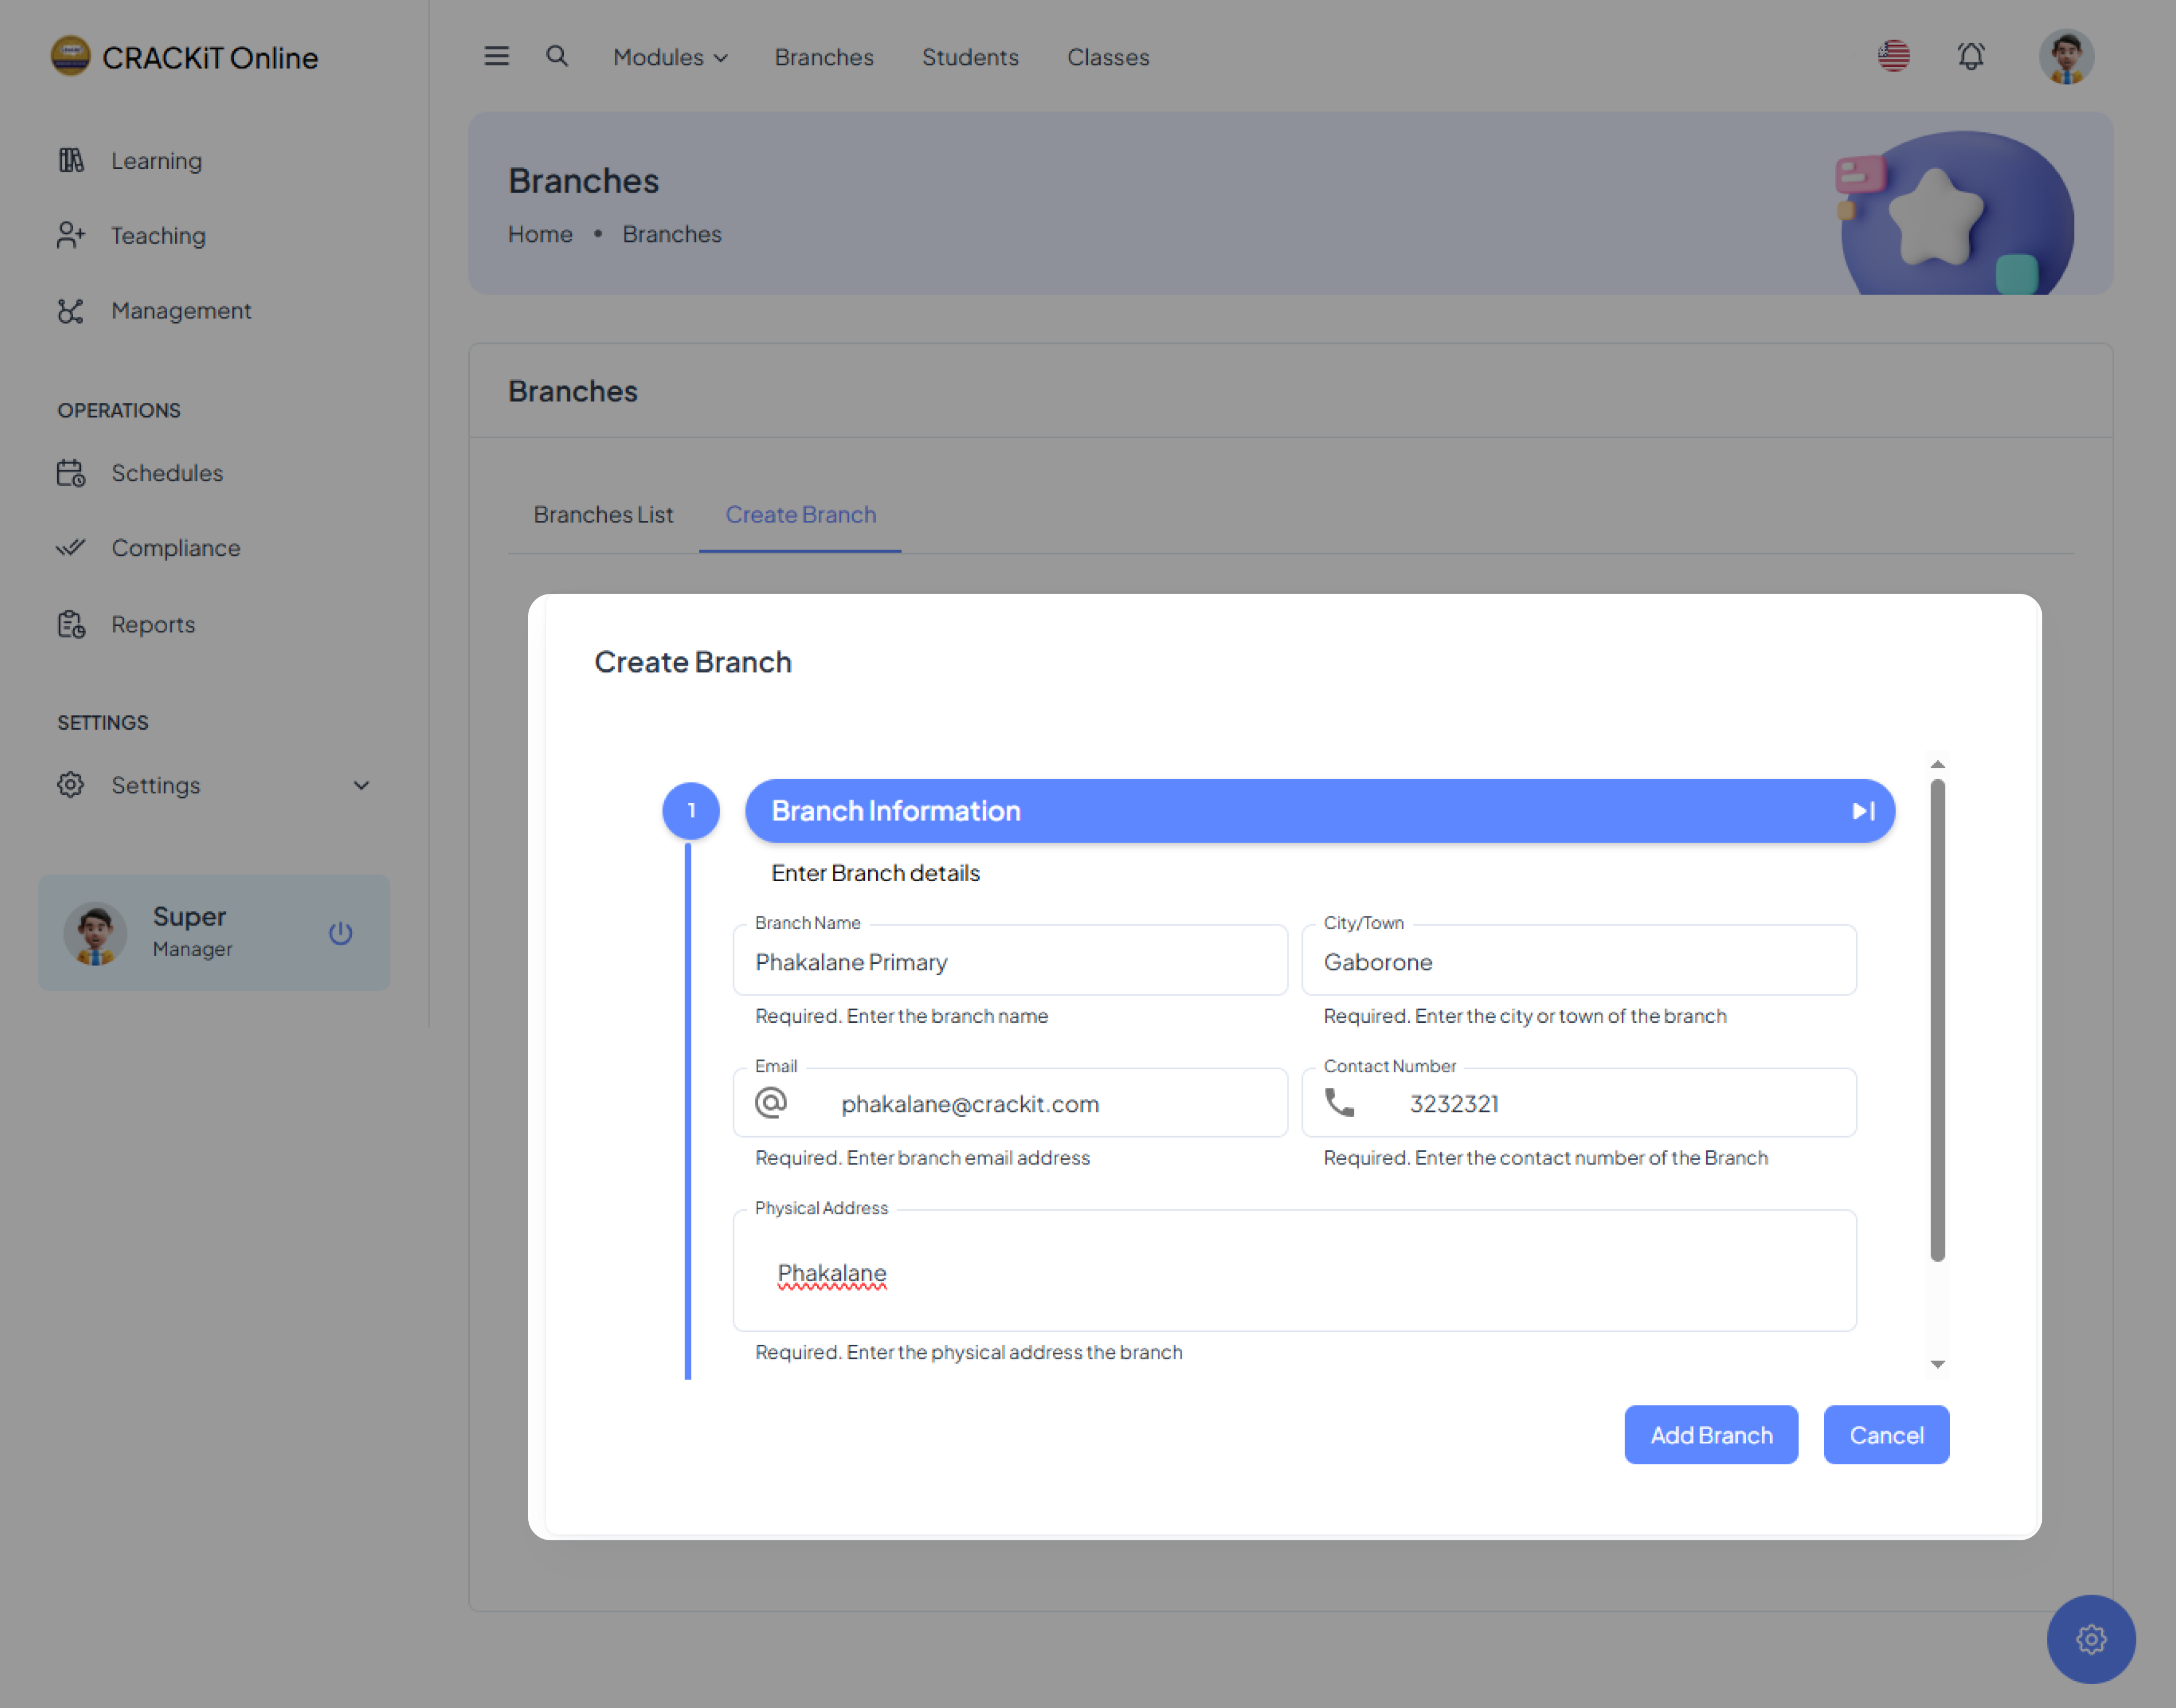
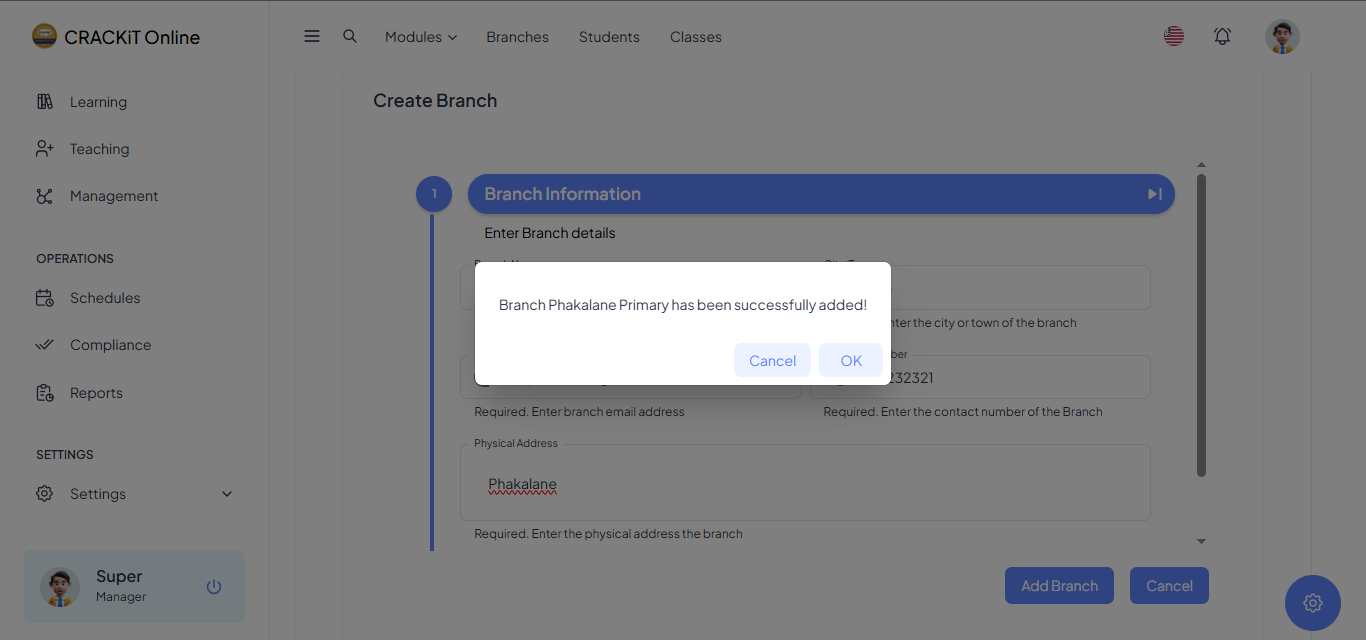
Once the form is completed, the user must click the "Add Branch" button to submit the information. A confirmation pop-up will appear, and the user must click "Ok" to exit.
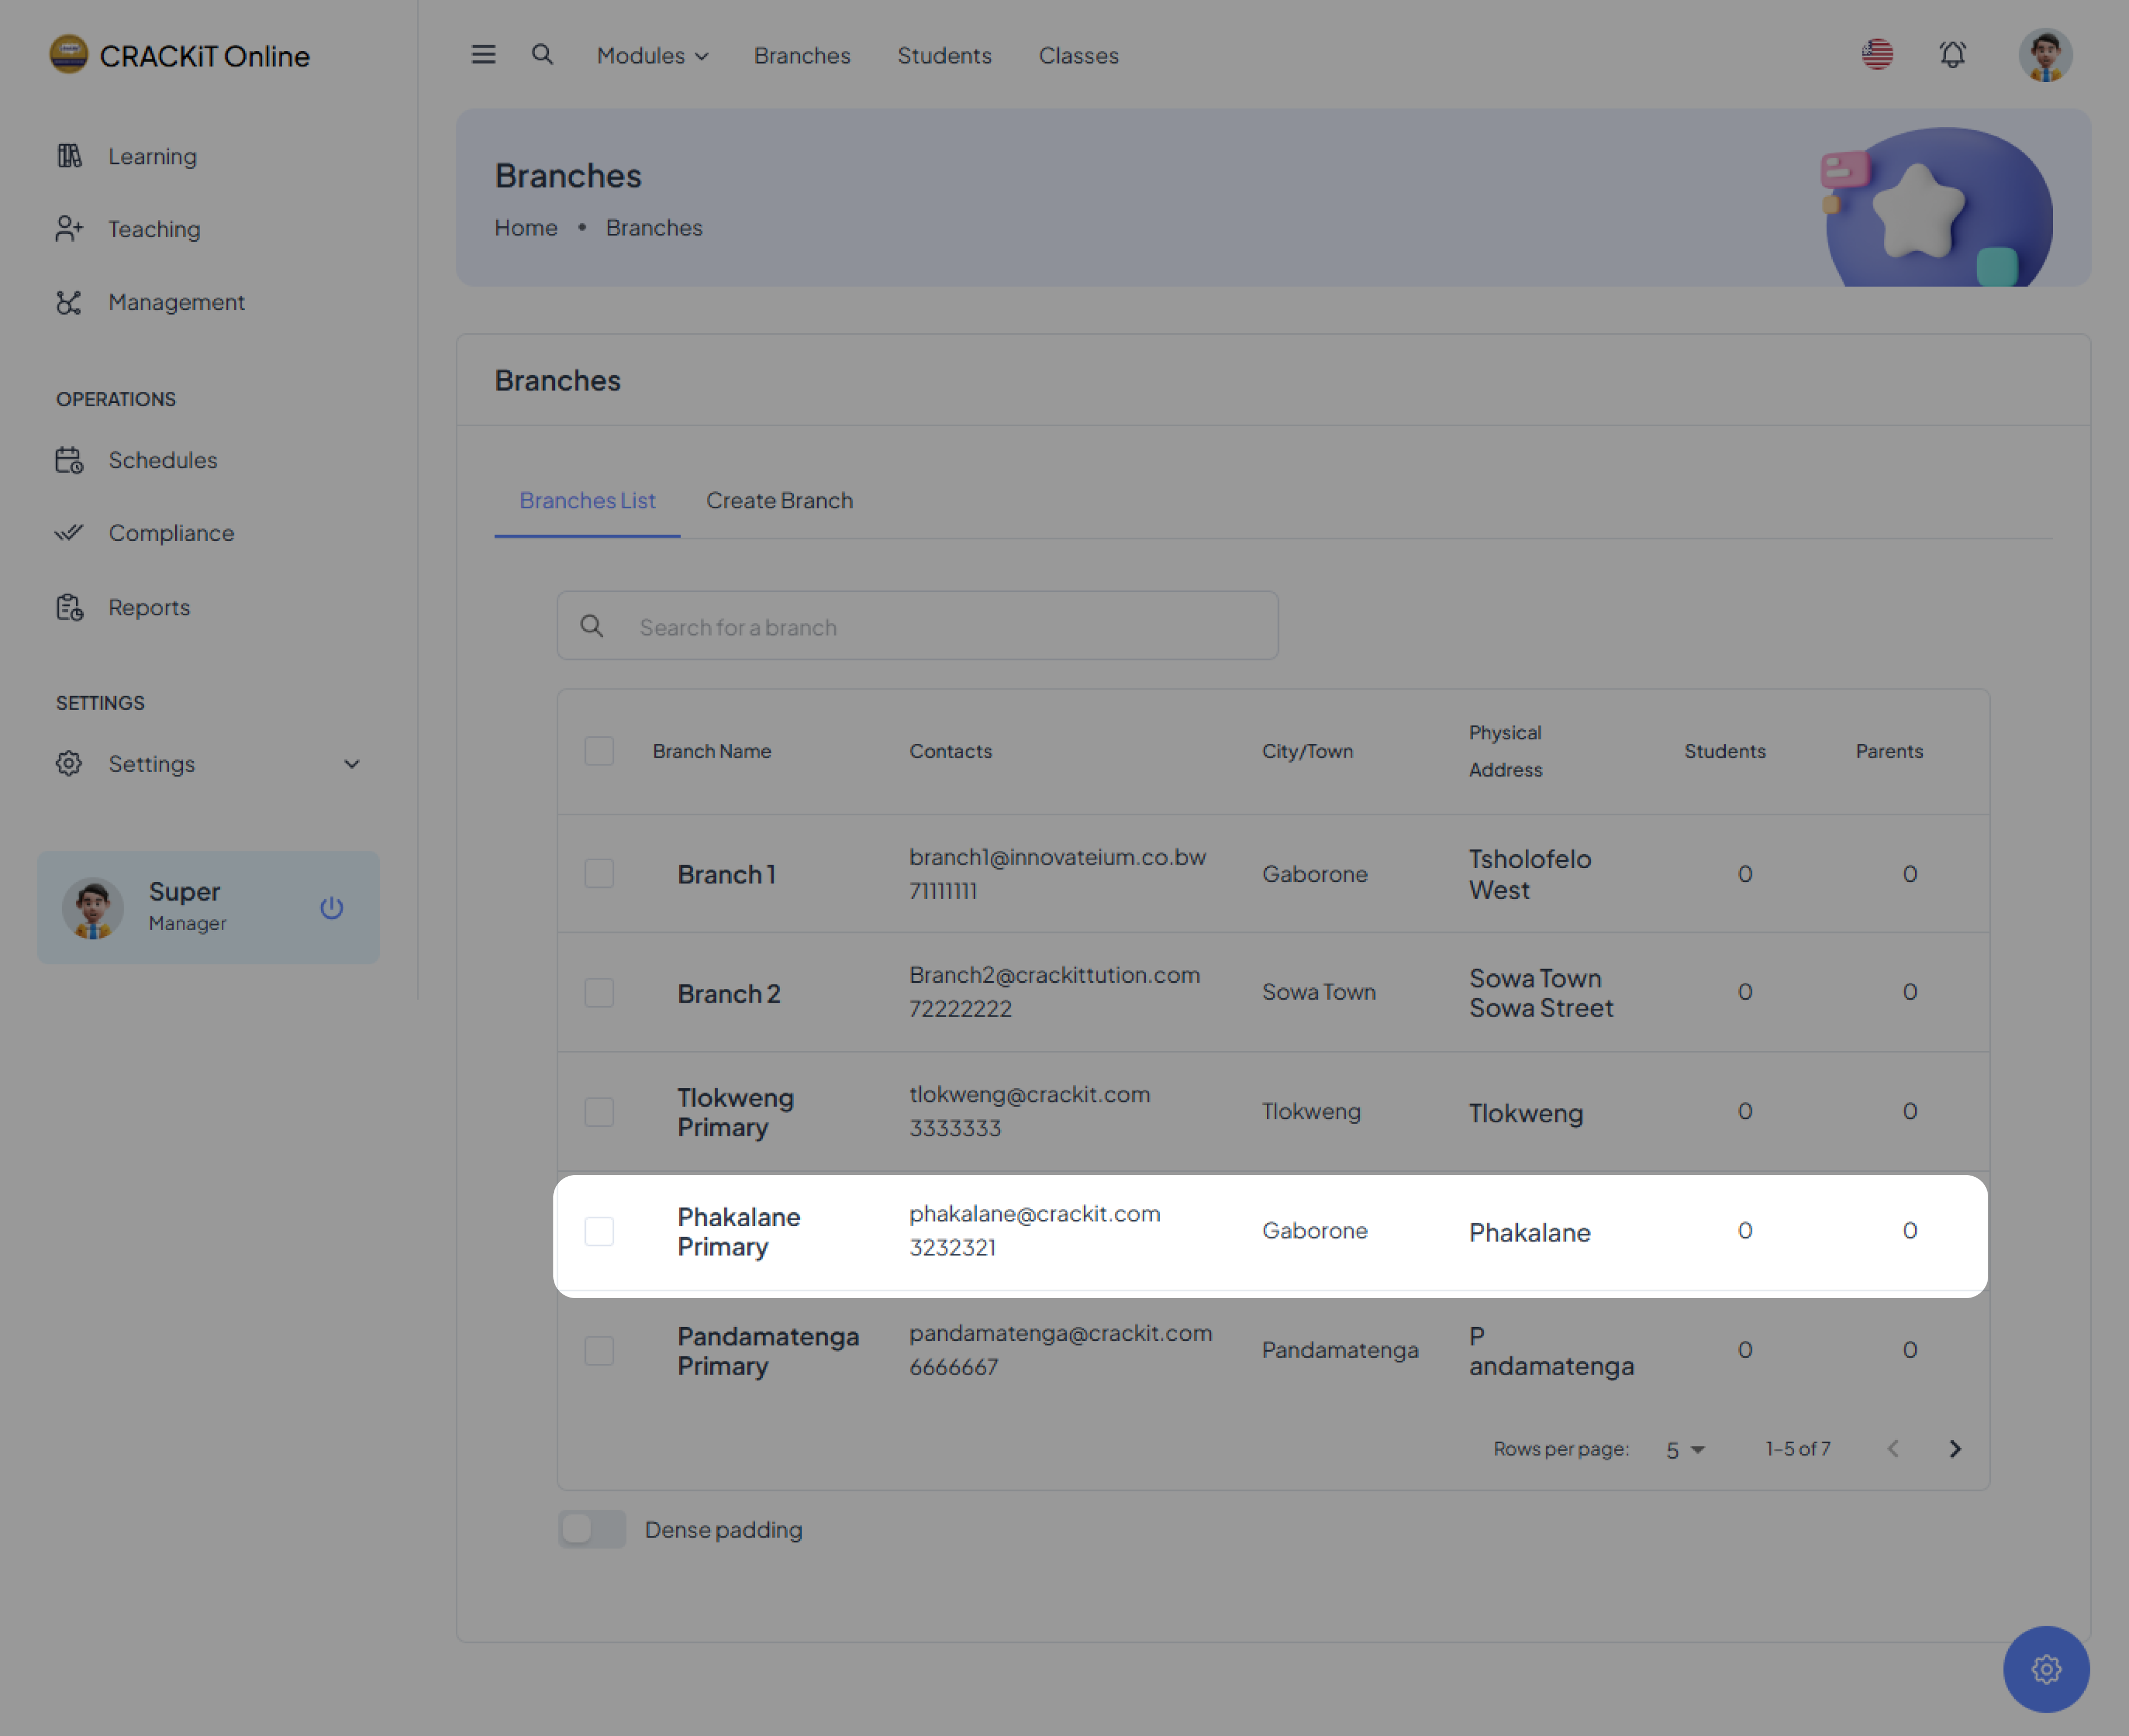
The newly created branch will automatically appear in the Branches List as shown below.
Searching for a Branch
To locate a specific branch, the user must click on the search box, type the branch name, and press Enter. This will display the relevant search results. [screenshot]
Sorting Branches
To sort branches in the database, the user must hover over the Branch Name column header. When a gray arrow appears, the user must click on it to sort the column in either ascending or descending order. Clicking again will toggle between the two options.
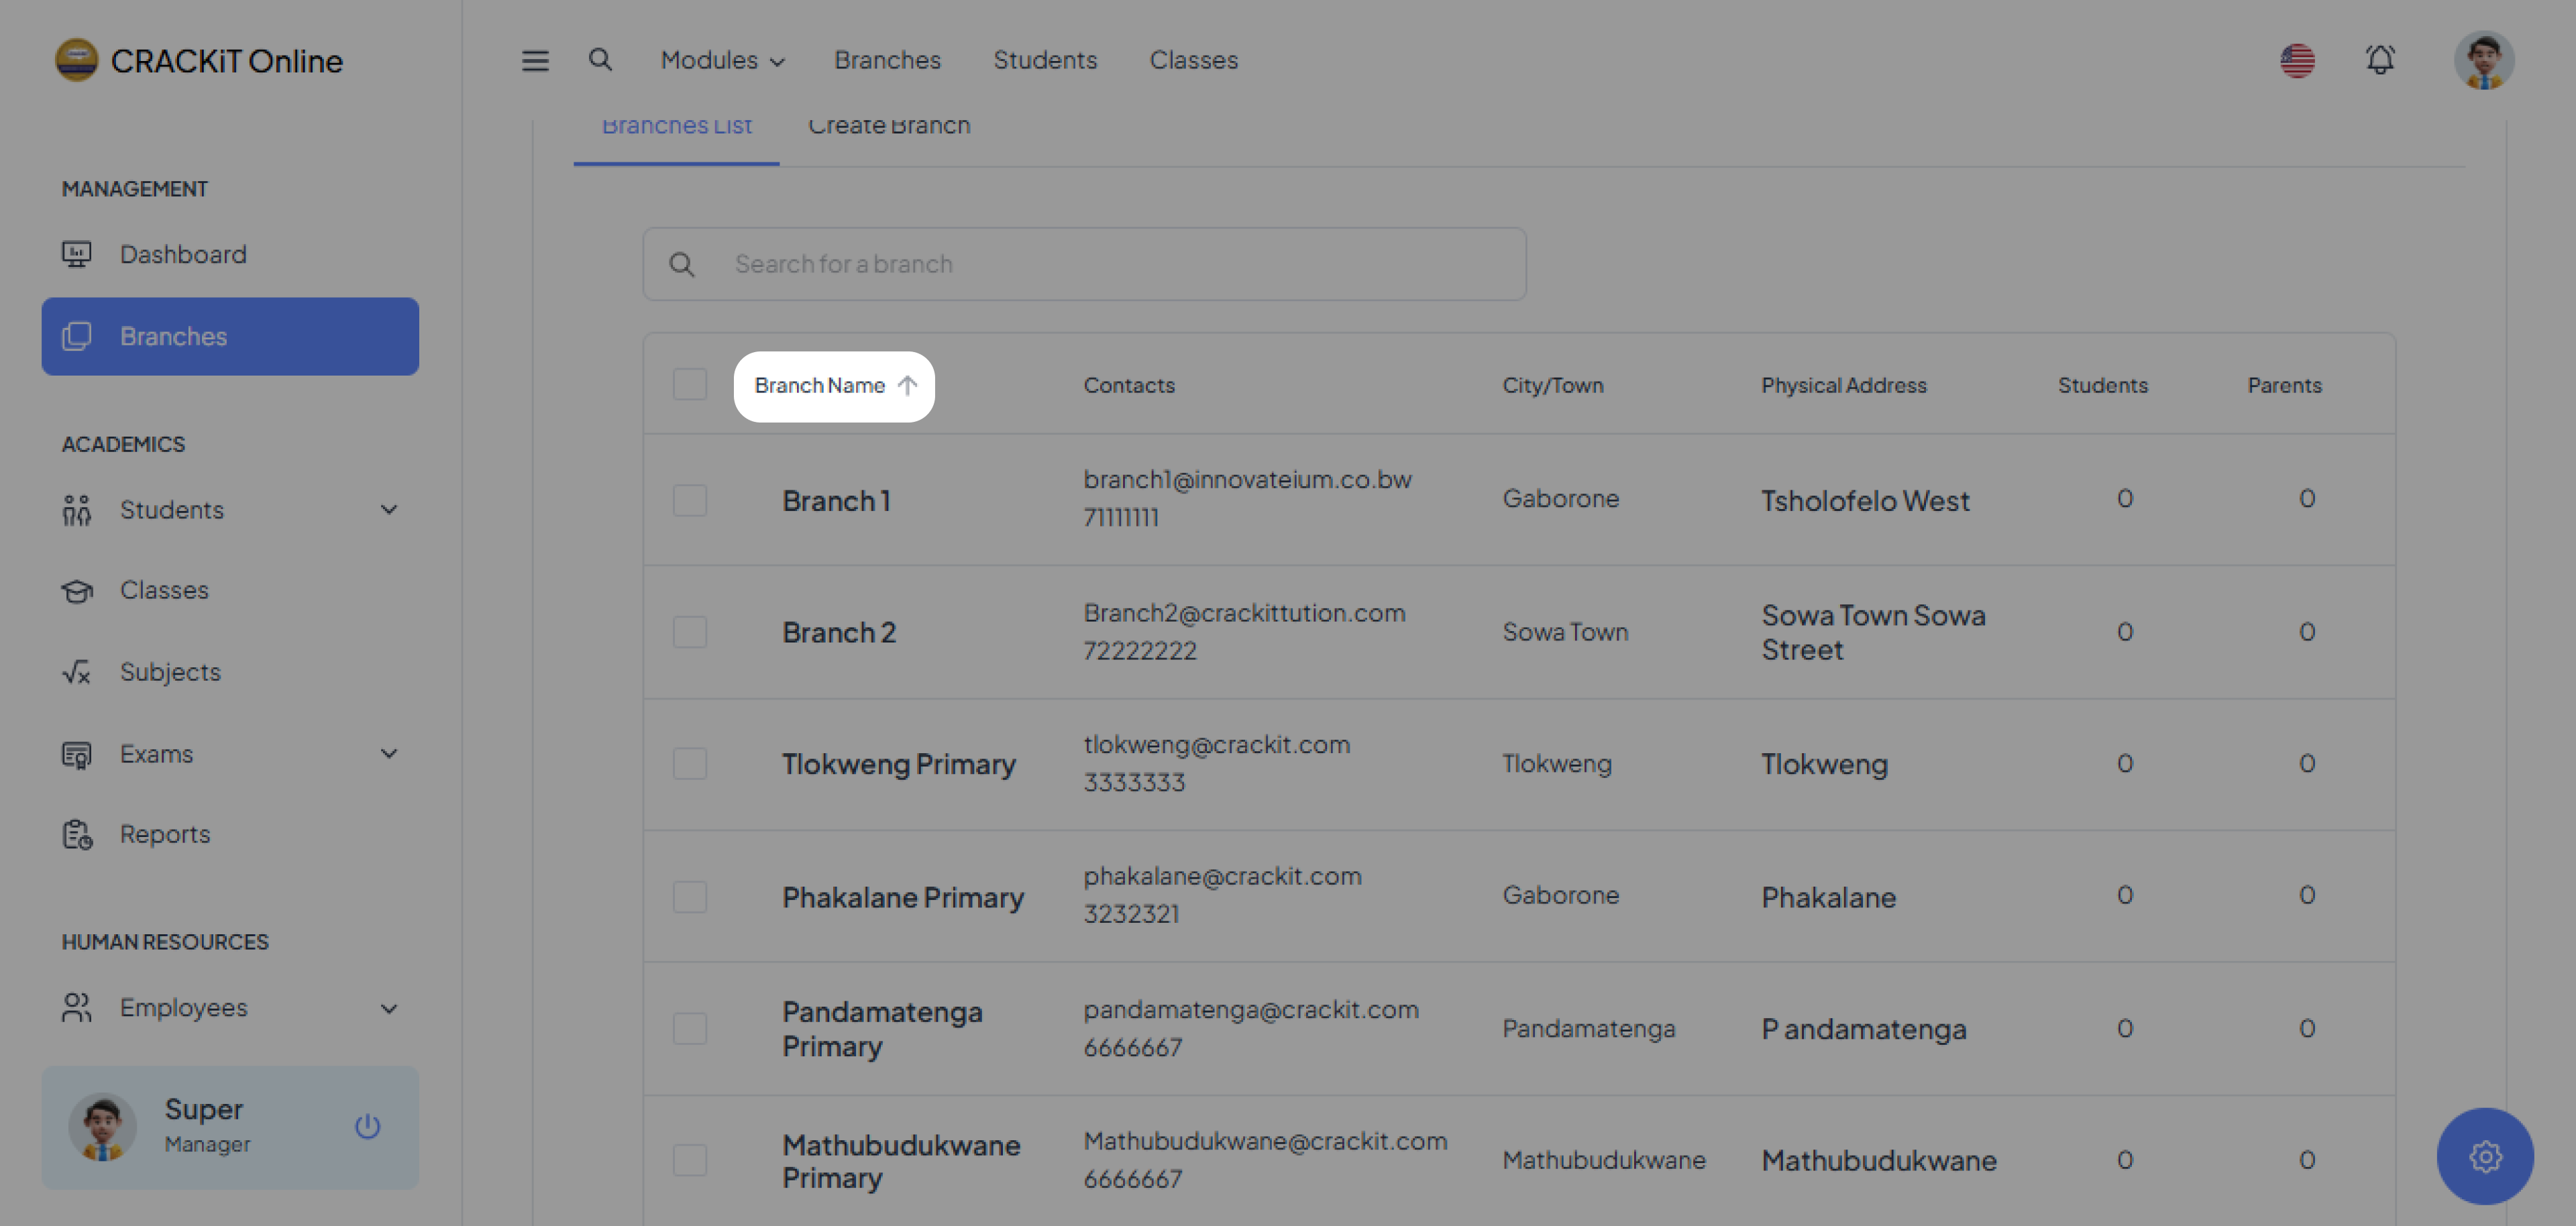 Note: Sorting by other criteria, such as location or contact details, follows the same process as sorting by name.